Produce traditional and vertical videos with the same footage!
Posted on 25 January 2023
The other morning, I had one of these lightbulb moments: a crystal-clear idea for a short video.
I suddenly had that detailed vision of a short-form edit showcasing the powerful arbitrary properties in Tailwind CSS.
I created a new Notion page, and wrote the whole script pretty much in one free-flowing attempt:

I could already feel this was going to be a really good piece of content.
A couple of hours later, I had recorded and edited a video for both YouTube (traditional 16/9 landscape) and Twitter/TikTok/YouTube #shorts in vertical format!
Before diving into the details of the journey, here’s that vertical video that I shared on Twitter:
🔥 Tailwind Tip 🔥
— Simon Vrachliotis (@simonswiss) January 19, 2023
Did you know that @tailwindcss supports **every** CSS property in the CSS spec?
Yep, even those that don't exist yet 😅 pic.twitter.com/jPHNkkXPKc
Pretty cool, eh?
And I was able to use the exact same footage for a traditional, landscape mode video:
That’s rad!
I’d like to take you through my learnings in this journey. Let’s dive in.
The recording process
For this one, I decided I was going to record the camera/audio work separately, and do some screen recordings later.
Why?
Good question. I am not 100% sure lol. I think one of the key reasons was that my kids are currently on school holiday. It’s a hot summer. People mow lawns. Cicadas sing obnoxiously loudly.
In other words, a lot can go wrong with audio/camera recordings in this house at the moment.
You also may have read my recent content creator life crisis thread on Twitter about going back to making things simple and enjoyable for myself.
Recording audio and screen in separate sessions has its own set of challenges (that could be the topic of another post!).
But honestly, for me personally, the logistics of doing it separately are exponentially much simpler and less taxing.
Ok, so looks like I actually know exactly why I did it this way 🤣
Recording the on-camera + audio
I set up all my lights, closed the window and door. Checked my hair, opted for a hat instead (😅). And I hit record.
I recorded the whole script, presenting to the camera.
Some of the parts that I knew would be audio-only, I was just reading from the screen instead of doing eye contact with the audience. But I still recorded everything in one take.
It’s the best way to have a consistent sound throughout the whole video. And consistent energy, tone of voice etc.
Side note: I took particular care in this session to not use a “on-air” voice. I tend to speak differently when I do a presentation to when I speak normally.
For this one (and going forward), I wanted to sounds just like I was talking to a friend. The normal simonswiss. I think it’s the best kind of simonswiss.
I did have numerous positive comments on my particularly good energy in this video, so… my theory must have some legs to it.
Recording the screen
Aaaahh. Finally.
I know. If you’re here from the title of this post, this is what you’ve been looking for. I just needed to set up the stage for… no particular reason 😅
Okay, let’s dive in.
I did my routine thing:
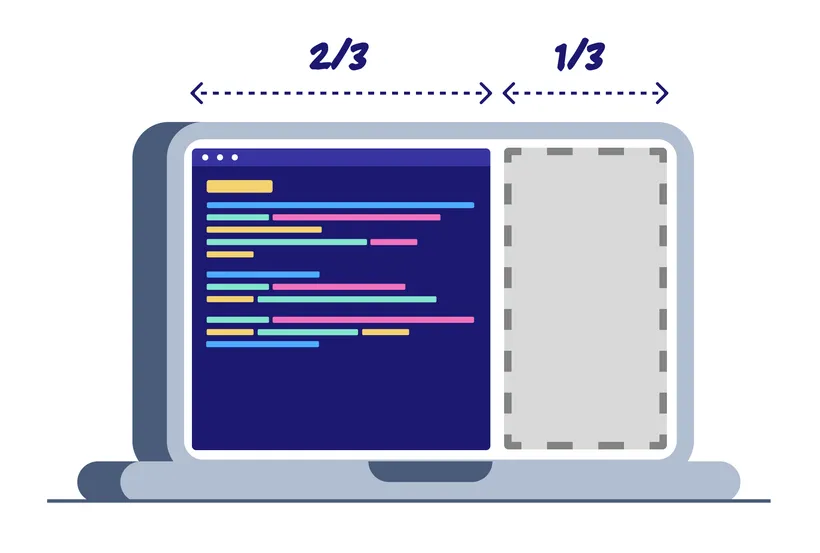
- Set the screen resolution to
1280x720HDPI (shoutout to How to egghead) - Setup vscode with a “preview” UI on the side. I did my typical 2/3 code, 1/3 UI (roughly) split.
- Get in Zen mode + full screen for a clutter-free UI
- Fire up OBS, make sure the correct screen source is set.
- Hit record 🔴
The aha moment
Right there and then, before I even typed one character in my recording, I heard an inner voice.
It YELLED at me.
STOOOOOOPPP!!!
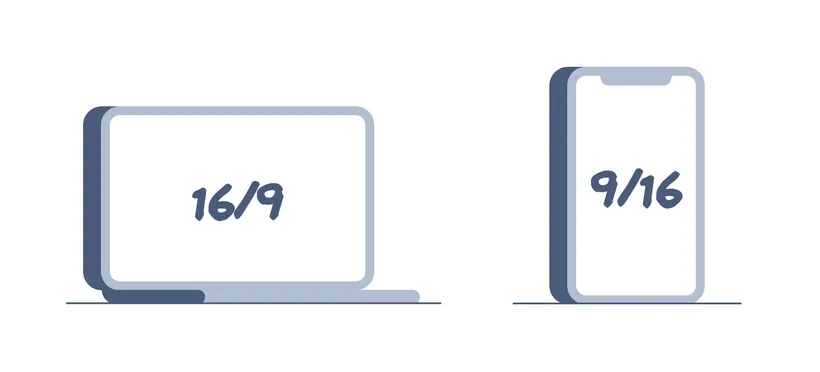
It reminded me that I always wish I did a certain screencast in vertical format instead of the traditional 16/9 ratio.
Just like web design went through a “responsive design” transformation many years ago… making videos now requires the same responsive design thinking.
I know this, and I have known this for years.
In 2019, I was telling everyone to start doing TikToks and get used to creating content in vertical format:
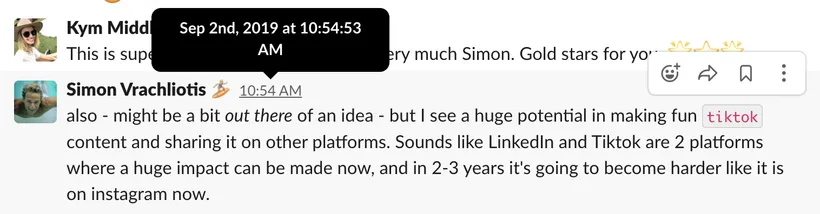
Yet, almost 4 years later, I still really haven’t really gotten into the habit myself.
Boo, Simon. Big boooo.
Anyway… not this time!
Write Record once, use edit everywhere ™
You know that developer’s dream of writing code that works on iOS, Android and web? I mean, it’s not just a dream - there are tools getting you very close to this.
I have the same dream with making videos.
I want to record once, and use the same footage for creating YouTube traditional videos, but also YouTube #shorts, TikToks, Insta Reels, and even… vertical Twitter.
Start thinking mobile-first, just like the web.
As GaryVee predicted all these years ago (it’s actually called pattern recognition), TikTok got so popular that it forced all other platforms to come up with a similar, short vertical video format.
And with the majority of computers being pocket phones, this trend is not going anywhere.
You don’t have to make vertical videos if that’s not your jam… but we’ve seen what happened to websites ignoring the responsive design revolution.
Well, users can pinch to zoom on my website!
Yeah, right.
It’s pretty obvious that most platforms will push and promote vertical content. Again, they’re competing with TikTok. People can still view your landscape videos and flip their phone sideways.
But the platforms you publish your videos on are likely to help put your content in front of more users if you adapt to the new vertical format.
And provide a better user experience for the consumer.
I tell you what - if I’m holding my phone in one hand and the dog leash (or a coffee) in the other, I am not flipping my phone sideways to watch your video.
Watching a tiny landscape video on a vertically held phone is fine to watch a basketball highlight.
But trying to watch coding videos with tiny font size is… no fun.
Challenges of vertical coding videos
Ok, so I was set on this challenge of recording footage to be used for both 16/9 traditional format and 9/16 portrait mode.
This causes a whole lotta headaches when it comes to coding tutorials.
If you’re just showing talking heads on an interview, it’s really easy to just crop the speakers differently to stack them horizontally or vertically.
Matter of fact, there are a bunch of SaaS apps that do this for you automatically.
But cropping talking heads is the least of my problems here.
We’re talking about showing code snippets. Turns out you can’t really crop code snippets.
Video format doesn’t have the luxury of HTML text beautifully wrapping when the window is resized.
Maybe one day - it would be really nice!
The ideal format for “work everywhere” code snippets
Traditional 16/9 screencasts typically optimise to give the code as much real estate as possible.
If the output of the code (UI, console, …) makes sense in a narrow side panel, it can be displayed side by side with the code.
Otherwise, it’s pretty common to see a screencast “flip” between code and output, allowing both to alternatively use the full width of the video.
At least this is the format I’ve myself been following for many years, thanks to egghead mentoring.
It lets you set the coding font size much bigger, which is critical to allow users to watch your content on tiny screens.
Again, hints of mobile-first thinking here.
But there is a problem: that layout really doesn’t work well for vertical format videos.
If you’ve ever tried to “repurpose” one of your old 16/9 screencast to a vertical format, you likely made a quick realisation:
Wide code snippets are terrible for narrow screens.
They leave you with two options:
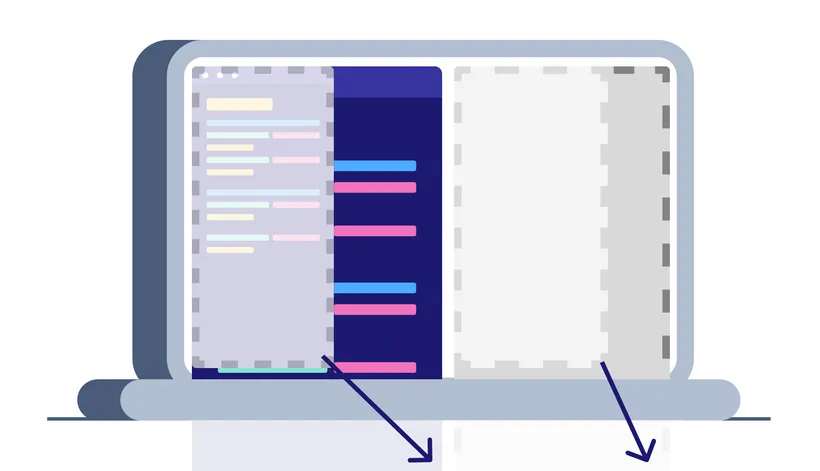
- Zoom out the code recordings to make them fit. Your viewers will have a hard time reading these tiny lines of code!
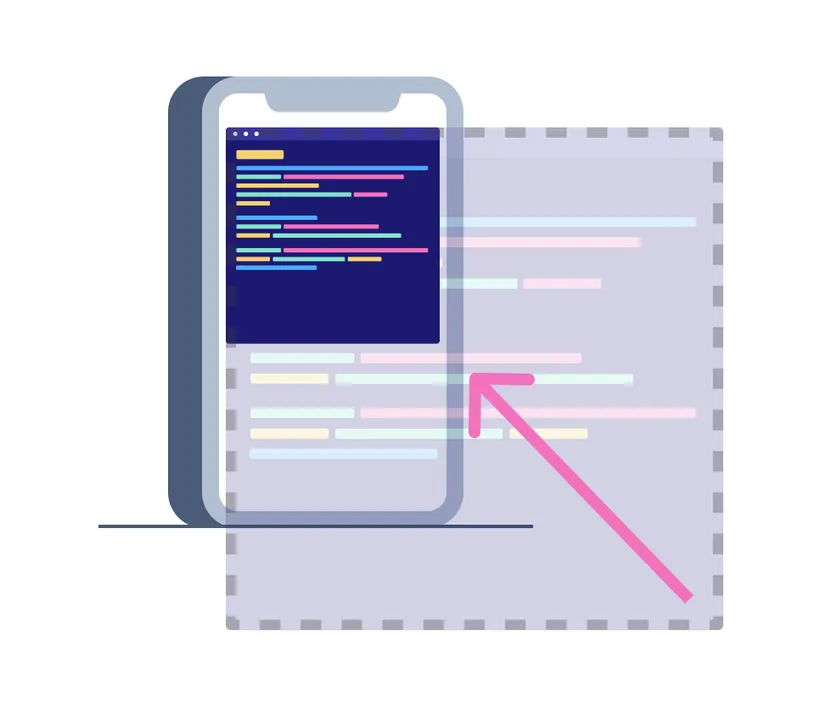
- Crop out the code, and somewhat fiddle with the “focal point” during the screencast, to show the most relevant part of the lines of code you’re talking about:
Both solutions are less than ideal.
Option 2 is better for the viewer, but will make your editing life miserable.
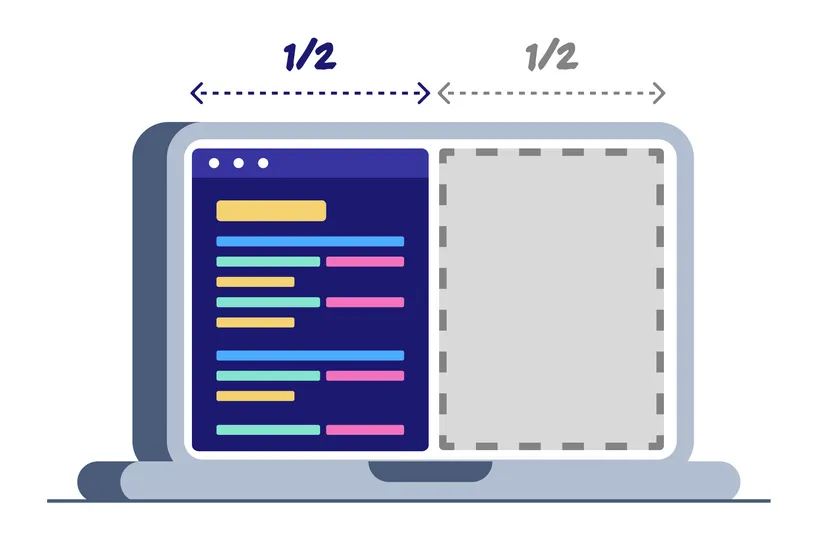
Okay, so… narrow code window, I get it!
To produce vertical code screencasts, you’d ideally want your code window to be pretty narrow.
Imagine your typical laptop screen. You’d want the code window to use 1/3 of the display width, and the full height.
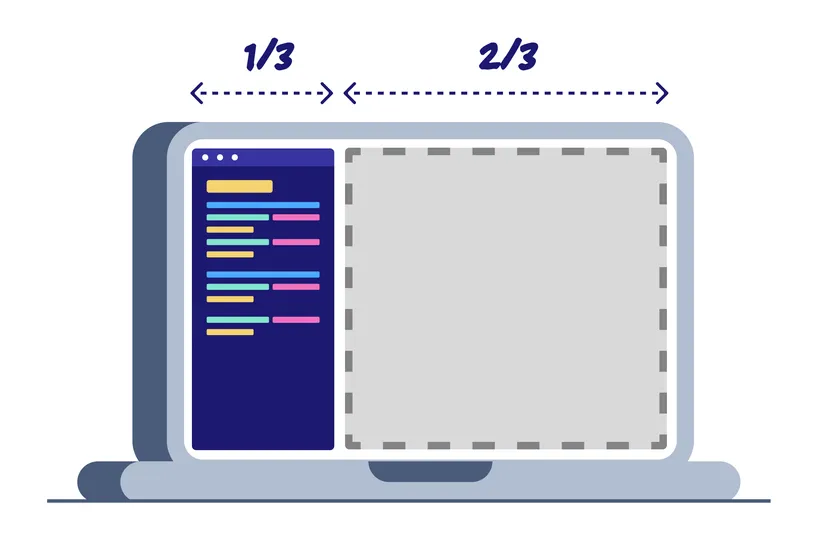
And you’d want to do the same for any eventual code output, like a UI or a terminal window.
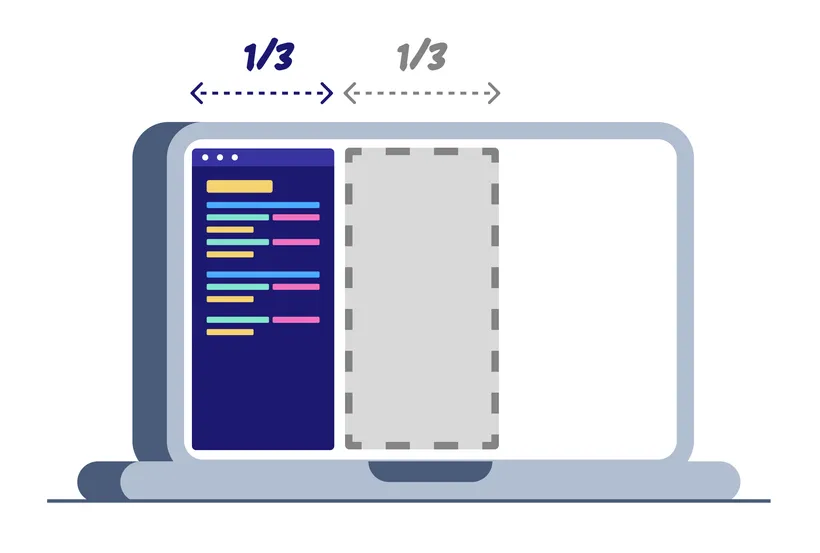
Look at that, you even have one last-third of screen real estate to capture a third source.
Amazing!
All you need to do is slice the right part of the recording in your video editing software.
You’ve got first-party footage for making vertical videos.
Look at you creating mobile-first videos! 😎
Wait. There is a new problem!
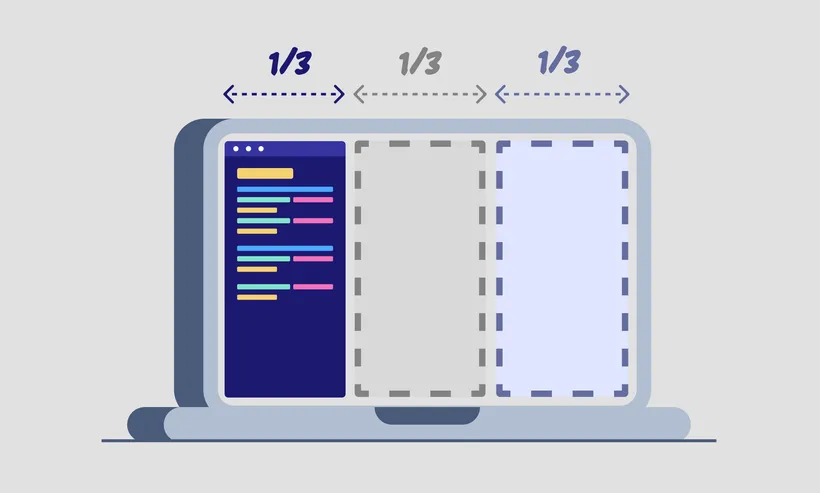
While that “split display in three columns” recording approach works really well for vertical format, we’ve kinda made the “traditional” landscape story less than ideal.
What do we do with all this horizontal real estate?
Zoom in the code and the output?
Actually, not a bad idea. It’s probably your best option.
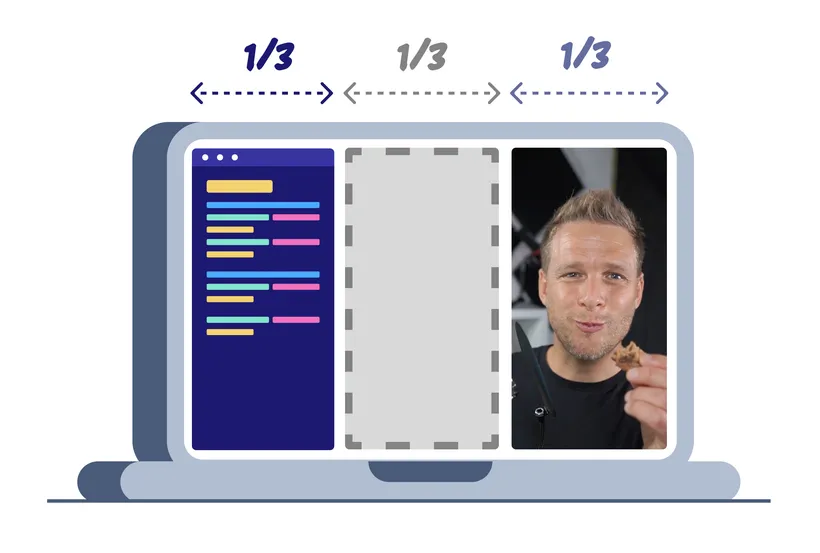
That, or you have your “sliced thirds” side by side, and fill the last third with your face, as the presenter.
There are options, but you’ll likely have this nagging feeling that you’re treating landscape video as a third-party citizen. An afterthought.
What used to be your staple of coding tutorials, your magic recipe for high-quality screencasts, is now relayed as an afterthought.
That’s sad. You probably don’t want that.
Landscape videos are still very valuable. Desktops are not going anywhere.
We need something in the middle
We’ve established that:
- Wide coding windows are too wide for vertical videos.
- Narrow coding windows are too narrow for landscape videos.
But what about… square windows?
Heh.
And by square, I mean “roughly” square. Let’s call it square-ish.
Think about it for a minute.
Both the 16/9 landscape and 9/16 portrait layouts can fit two square-ish shapes pretty nicely:
The math confirms it.
A square has a ratio of 1/1. Or… 8/8.
Put two squares side by side, and you have… 16/8. Or 8/16 if stacked vertically.
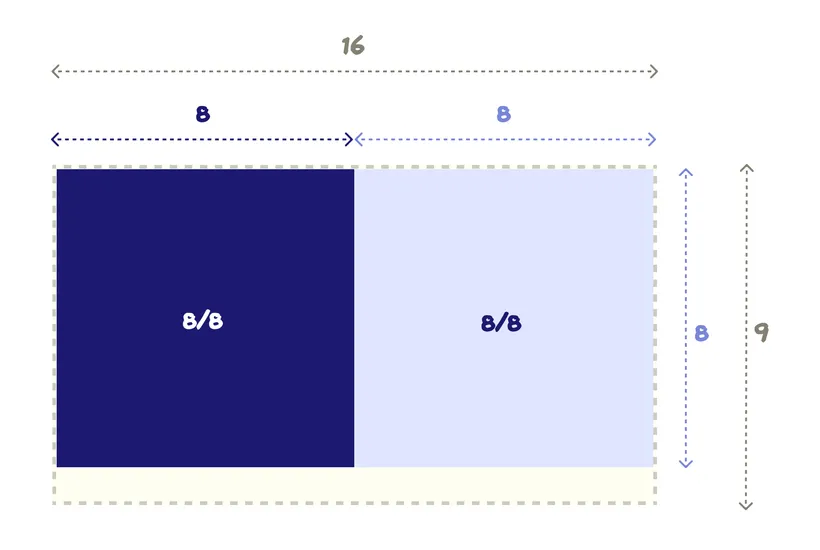
That’s pretty close to the most popular video aspect ratios!
And you know what’s another very popular video aspect ratio?
Yep. Square.
I bet that could work quite well with square-ish footage 🙂
Nothing replaces multiple recordings… but this gets us close!
Recording in squares sounds like a pretty good “overall” strategy!
You’re still making compromises. Nothing will ever truly replace two separate, “first-class citizen” recordings for landscape and portrait.
But it definitely gets you in this “good enough” space to consider saving a lot of duplicated recording time.
Here’s a concrete example
I proceeded to record my screen footage with square-ish windows for the code and the UI, something like this:
Once I was done, I dropped the recordings in my editing software, and went to work.
The traditional landscape video
When working with squares, remember that you’re working with “good enough” footage, but you might want to add a little bit of polish by making some custom window cropping, or add an overlay mask.
For this one, I didn’t really care too much about improving the layout of the YouTube video.
To be honest, I was just excited to validate my theory that recording square footage would allow me to create a vertical video with the same recordings.
I still gave some love to the video with some fancy animated text overlays, but I kept the code + UI layout as is.
Here’s the video:
I think it’s pretty darn good!
You can see the 50/50 split layout in the middle.
Note that I also boosted the font size a little, compared to my typical screencast.
I want the font to be as big as possible on small screens, so I boosted it to a level where it still was pleasant to look at, and didn’t wrap too much.
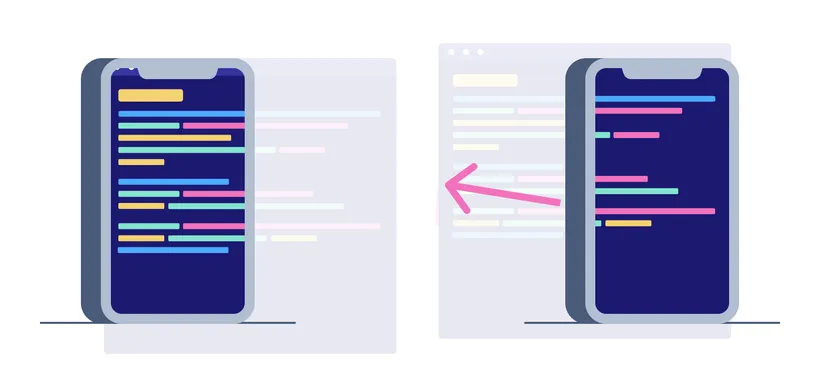
The vertical format video
For this one, I spent a bit more time. It was my first experiment with making vertical videos with square footage.
I had the theory in mind, I just needed to validate it.
I won’t go into details about the editing process here, but I will definitely write another post for this. I promise!
Regardless of what video editing software you’re using, the main “trick” will be similar. You basically want to duplicate the footage and stack the two clips on top of each other.
With some arbitrary cropping and positioning, you want to put the code and output on top of each other in the composition.
You may opt for a perfect vertical 50/50 split, but there are no hard rules here.
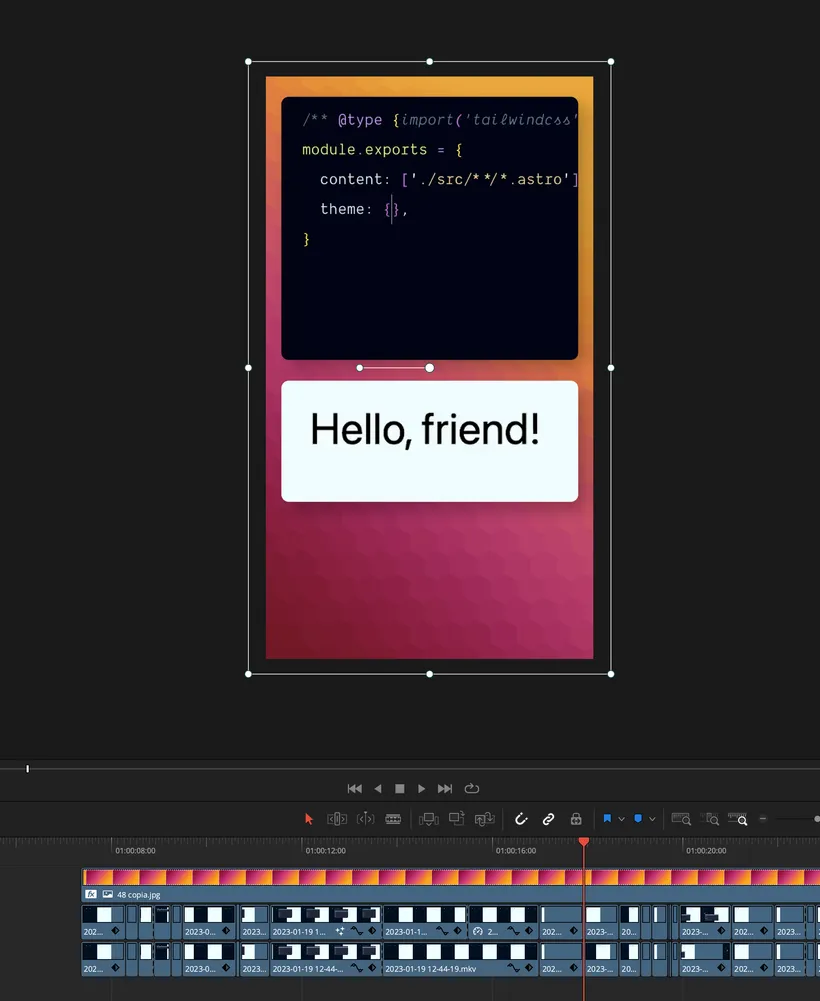
That’s what I did initially, and it looked like this:
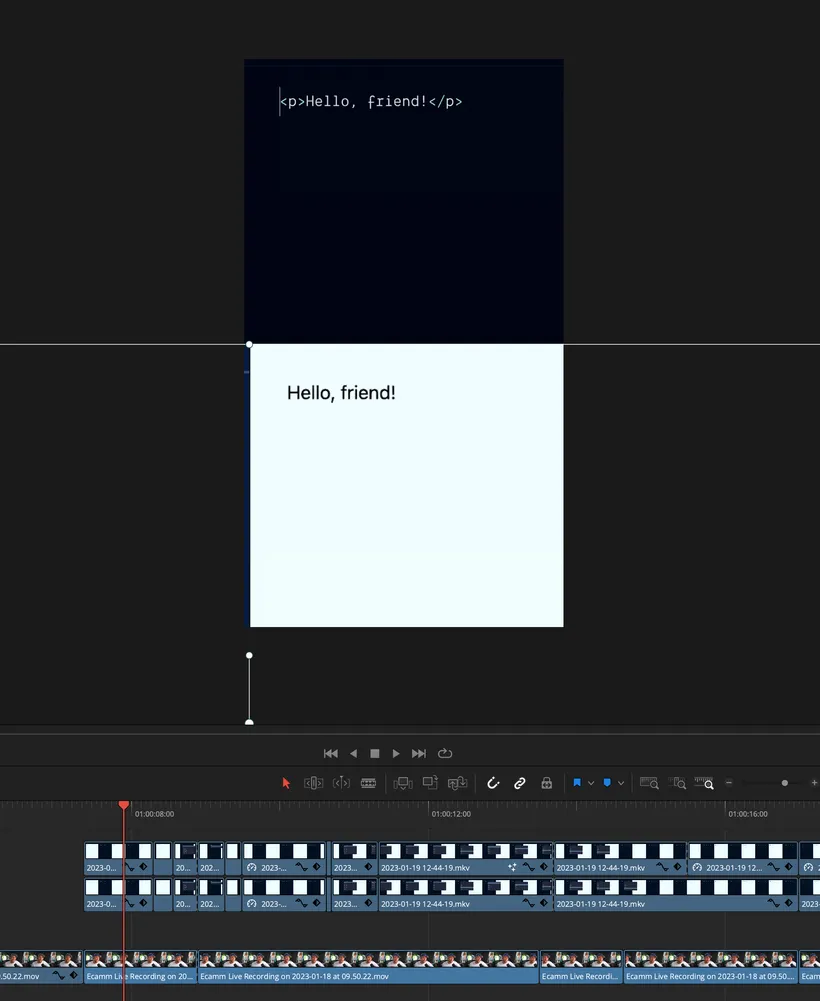
I then realised that at some point, the code was taking a little more vertical space than the half it was given.
And the UI did not need all the real estate.
I decided to nudge the split a little lower, to make things fit in better:

As I mentioned, there are no hard rules here. It depends on your content first and foremost!
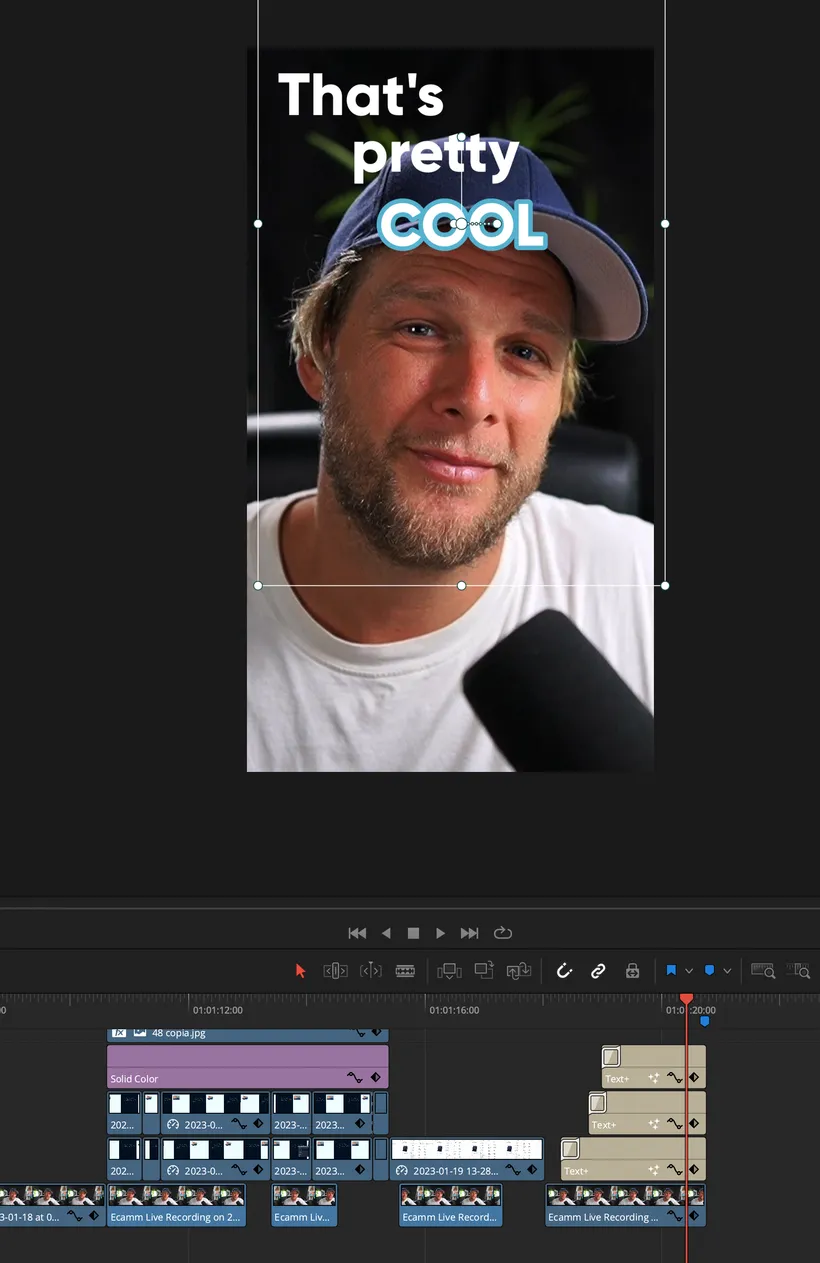
For my face, I just cropped the camera footage to make myself fit in the full window:
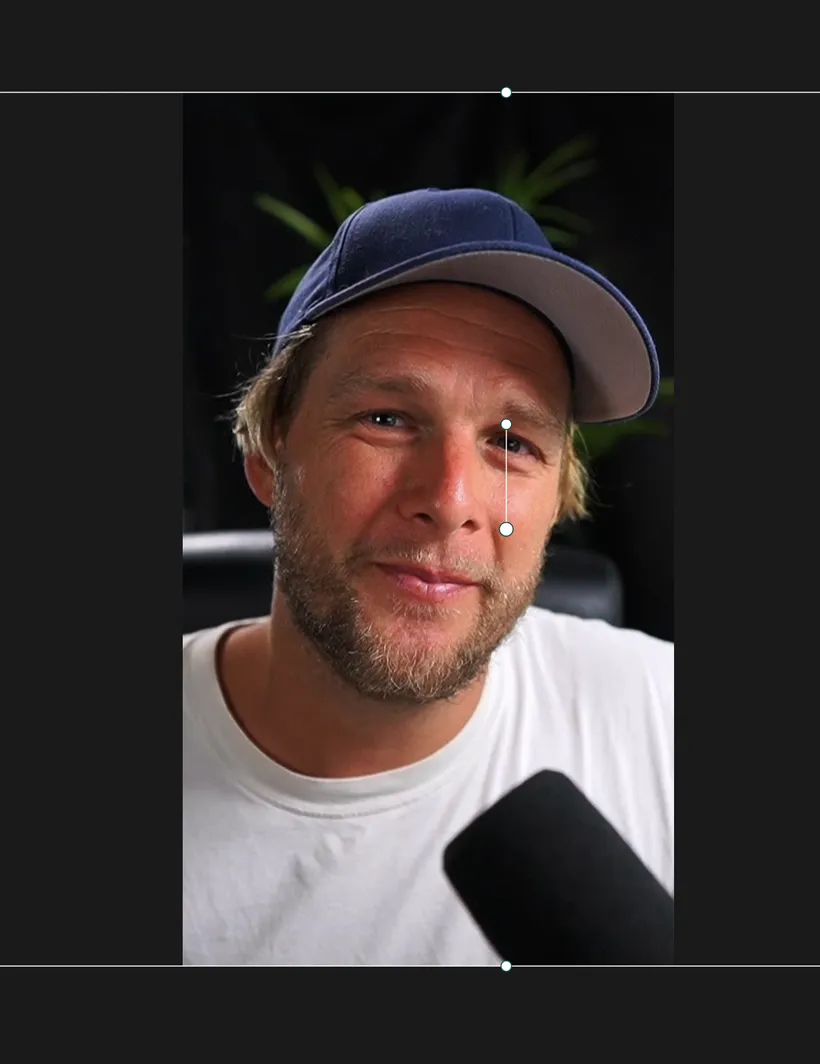
I don’t really feel the need to be in a little circle for the whole video, so I opted to be either front-and-center, or not there at all.
With those decisions made, I proceeded to edit the whole video.
It was okay. I almost shipped it, but… I wasn’t perfectly happy.
It was missing a little of the “WOW” factor that those highly engaging vertical videos typically get.
I judged that it needed some colors and some text.
So I created a fancy “overlay mask” that creates little “windows” for the code and the UI:
I’ll go into the specifics of this implementation in another post, but there are many ways to achieve this.
It’s typically a lot of work (for the first video anyway), and the video does not absolutely need that.
But in this case, I wanted to go the extra mile. And I think it paid off!
I also updated my animated text overlays from the landscape videos. The sizes and enter/leave positions were totally different, but the text and “timings” remained the same.
With those additions, the video went from “meh, it’s okay” to “HOLY SHEESH this is amazing!!”.
I’m really happy that I went the extra mile. It truly made the video much punchier.
And it made me proud and super happy!
You’ve already seen the video (it’s in the tweet at the top of the article).
But I have also made a shorter version with the fun/playful part at the end for YouTube #shorts, which must be under 60 seconds in length.
It really slaps. 😅 I love the super short aspect of it!
Okay, I think I am done here. Let me recap some of the things to keep in mind to record the pipe dream “universal, responsive footage” for coding screencasts.
Hot tips for recording “responsive” coding screencasts
- Record your coding + output in square-ish windows
- Make the font size as big as reasonably possible
- Add ample padding in your code and UI. This will make custom cropping much easier
- I also recommend turning on “word wrap” in your code editor, so everything remains within the screen!
Aaaand, that’s it for this one!
As promised, I will write another post where I show you how I created the “masking overlay” for the vertical video.
Thanks for reading, and have a lovely rest of your day 👋